If your looking for an individual Behavior System, then this Visual Schedule, Token Board and First Then strategy, are all in this Behavior Support Folder. This Visual Schedule combination make behavior expectations clear and manageable.
Ideal for special education teachers, behavior therapists, this folder brings together the most effective visual supports in one place!
WHATS INCLUDED:
* Visual Schedule– with activity visuals to follow throughout the day.
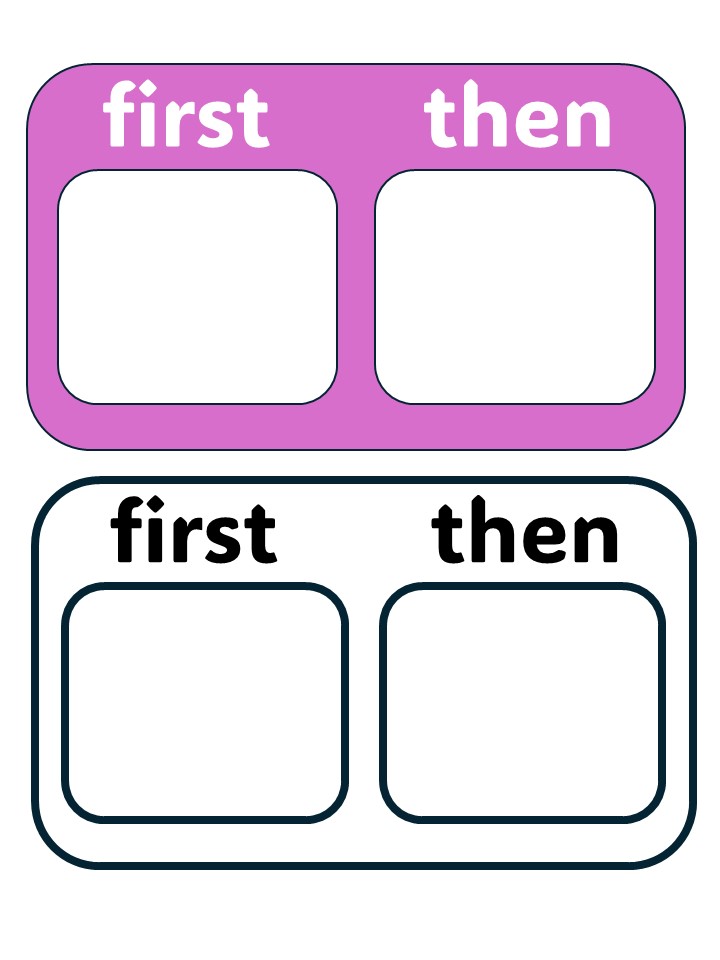
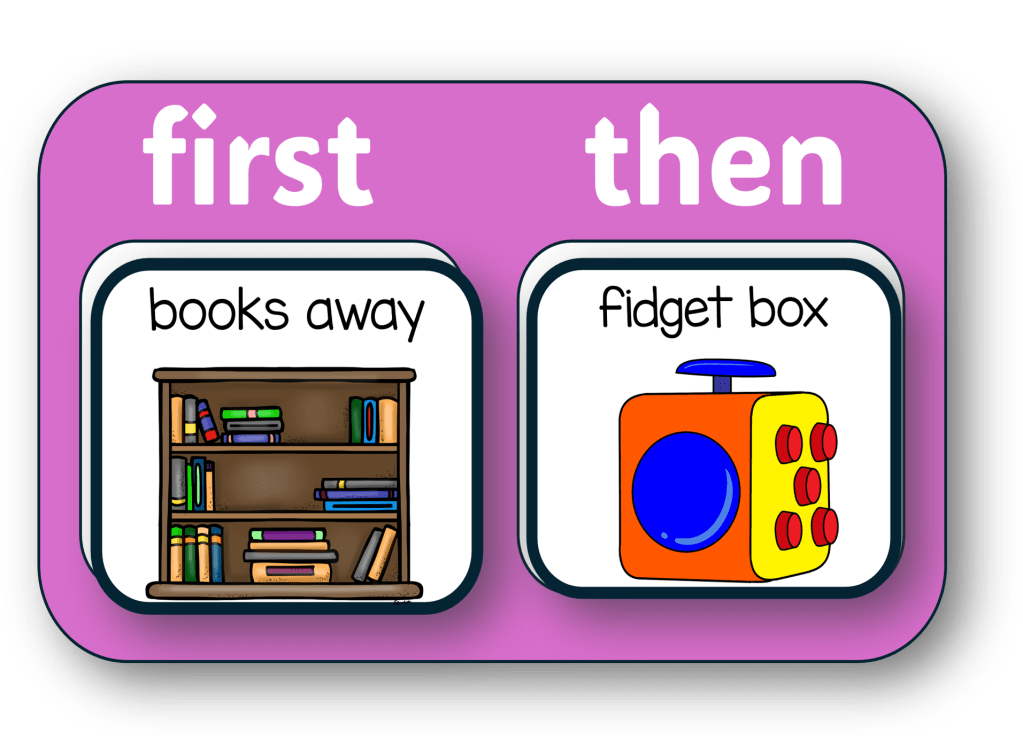
* First Then Board – Help students understand task sequences and motivate
follow-through.
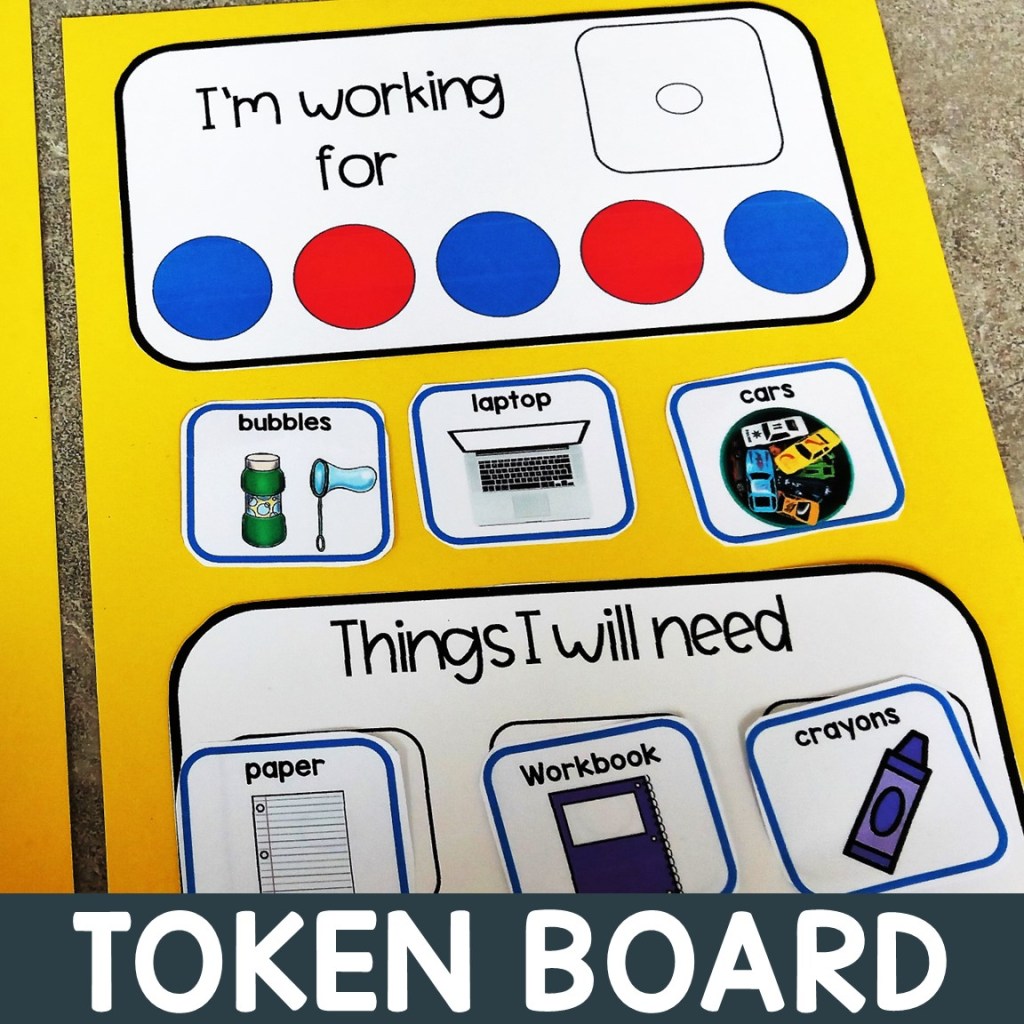
* Token Boards– Encourage positive behavior with customizable
reinforcement systems.
* Choice Boards– Promote autonomy and engagement
* Break Cards– Support self-regulation and emotional
awareness
* Printable Icons – Includes visuals for common tasks, rewards, and behavior
expectations with clear instructions.
* Editable package – Open in PowerPoint and enable editing, for you to personalise with names, motivator
choices, target behaviors and schedule visuals.
* In 2 Size Options A5 and A4
IDEAL FOR
* Autism Support
* ABA Therapy
* Behavior Intervention Plans (BIP)
* Classroom & Special Ed Settings
WHY YOU’LL LOVE IT
✔ Easy to prep and use
✔ Engaging visuals that are student-friendly
✔ Individual supports great for your behavior plans
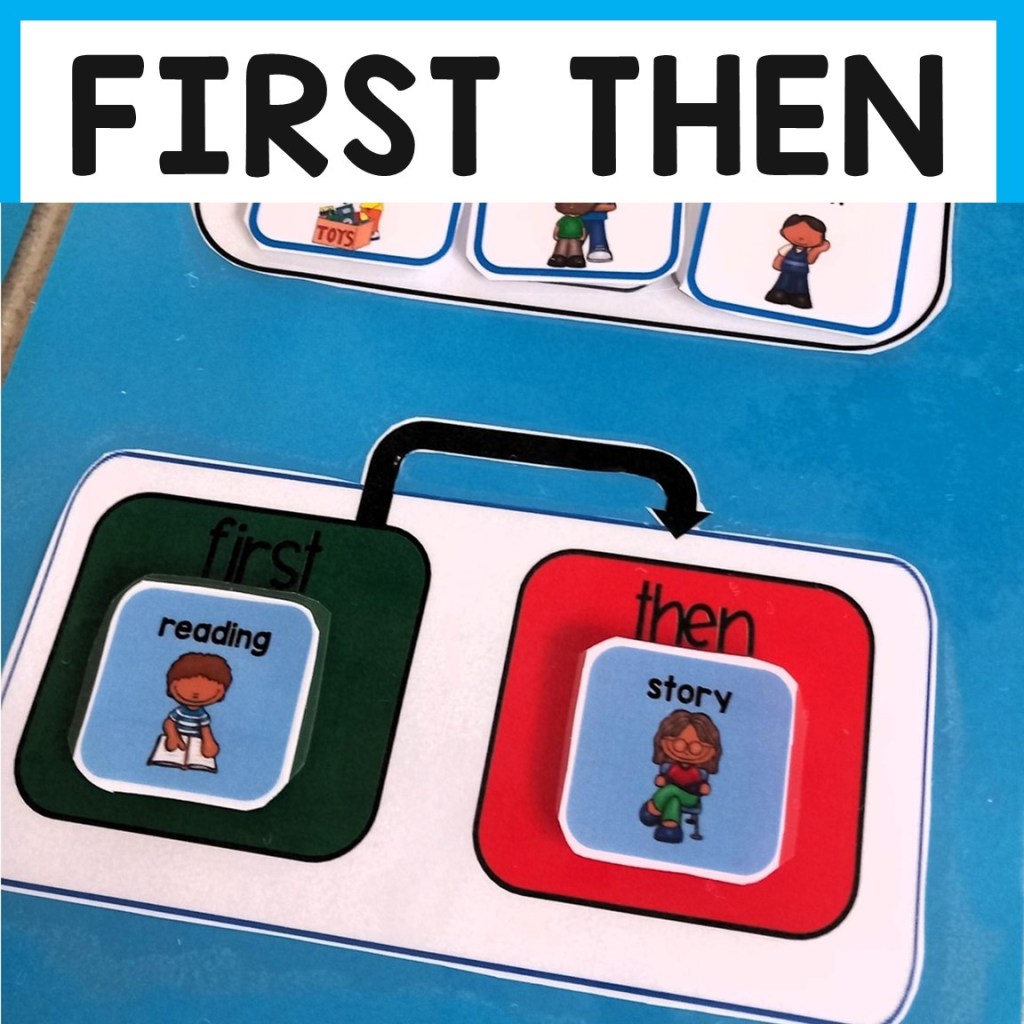
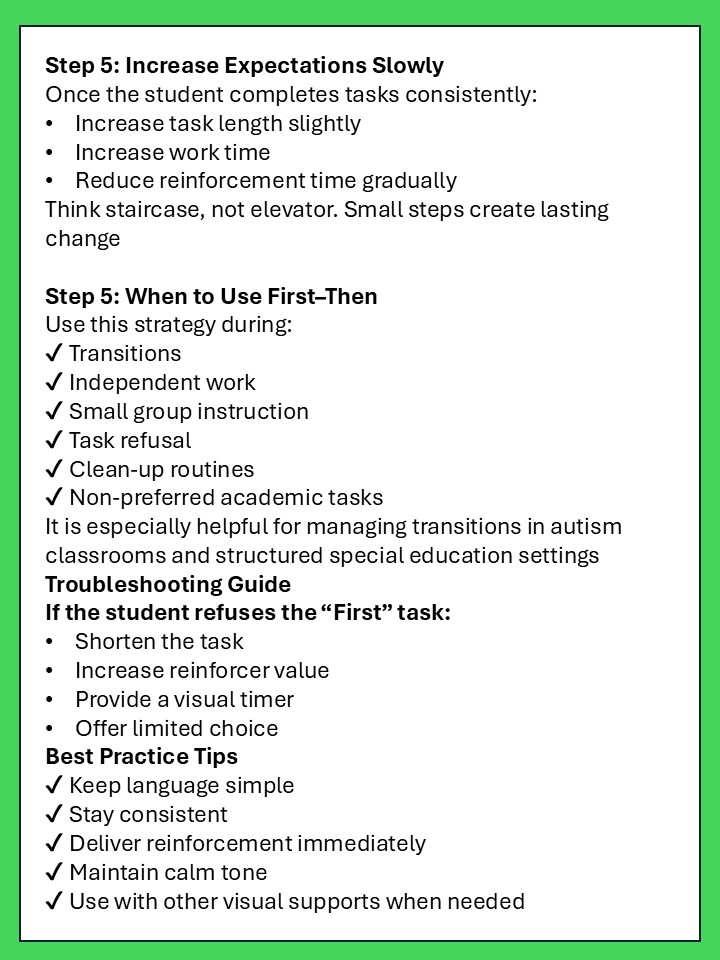
These First Then board templates with Visuals Cards are a simple, evidence-based schedule for classroom management, designed specifically for PreK–2 Special Education classrooms.
The First–Then strategy provides clear expectations, visual structure, and positive reinforcement to improve behavior and increase task completion — without constant verbal reminders.
Why Use a First–Then Board?
Students with Autism spectrum disorder often benefit from predictable routines and visual supports. The First–Then strategy, commonly used in Applied Behavior Analysis (ABA), helps reduce anxiety and increase cooperation by clearly showing:
✔ What task must be completed ✔ What reinforcement comes next
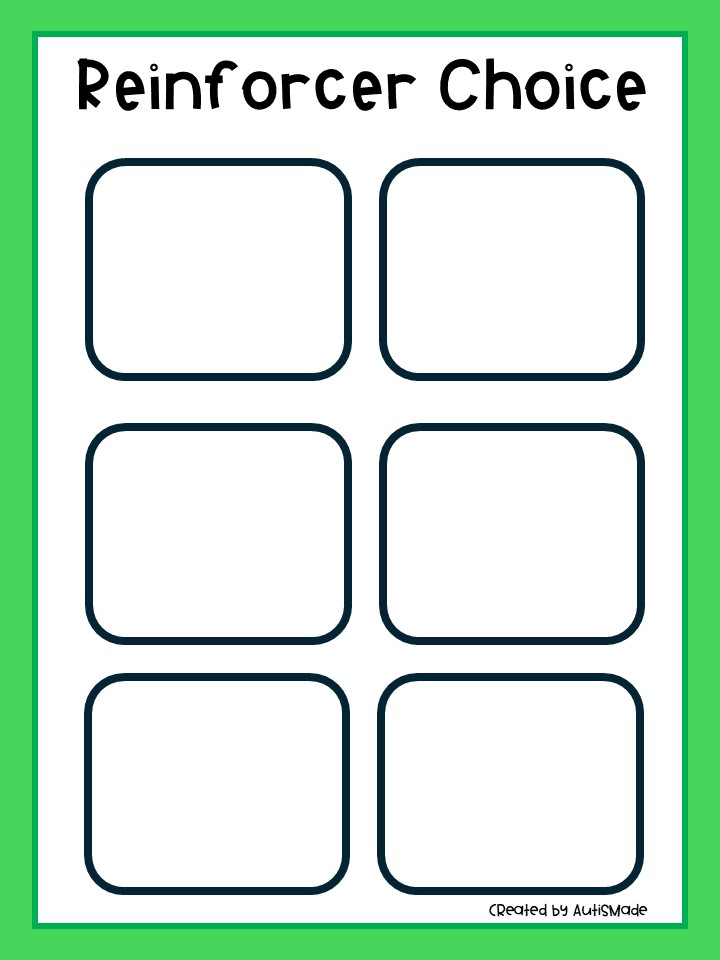
What’s Included in This Resource
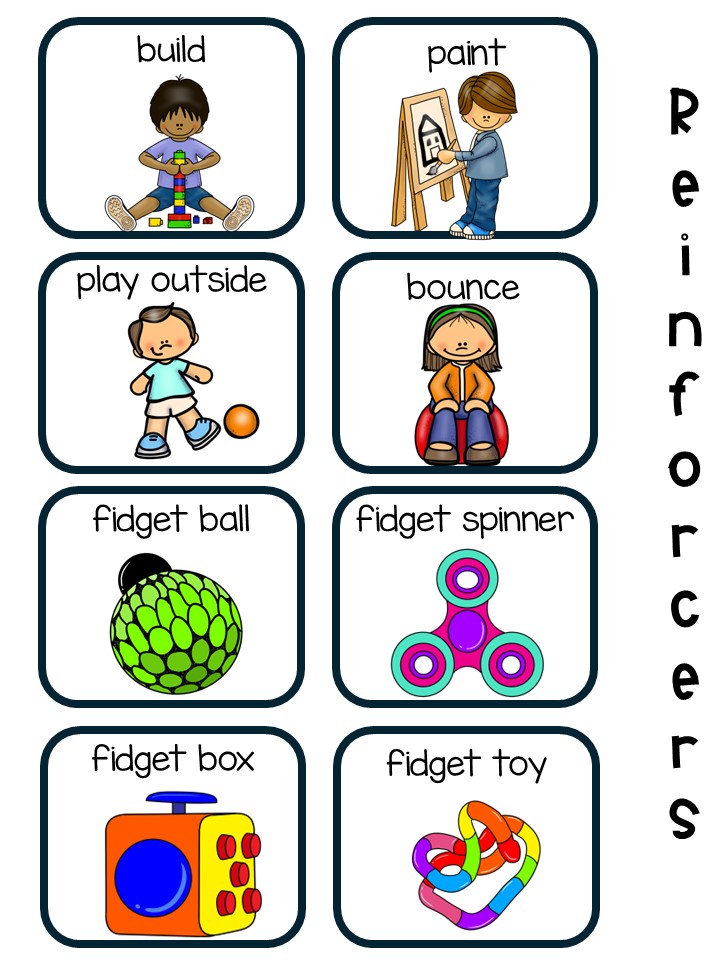
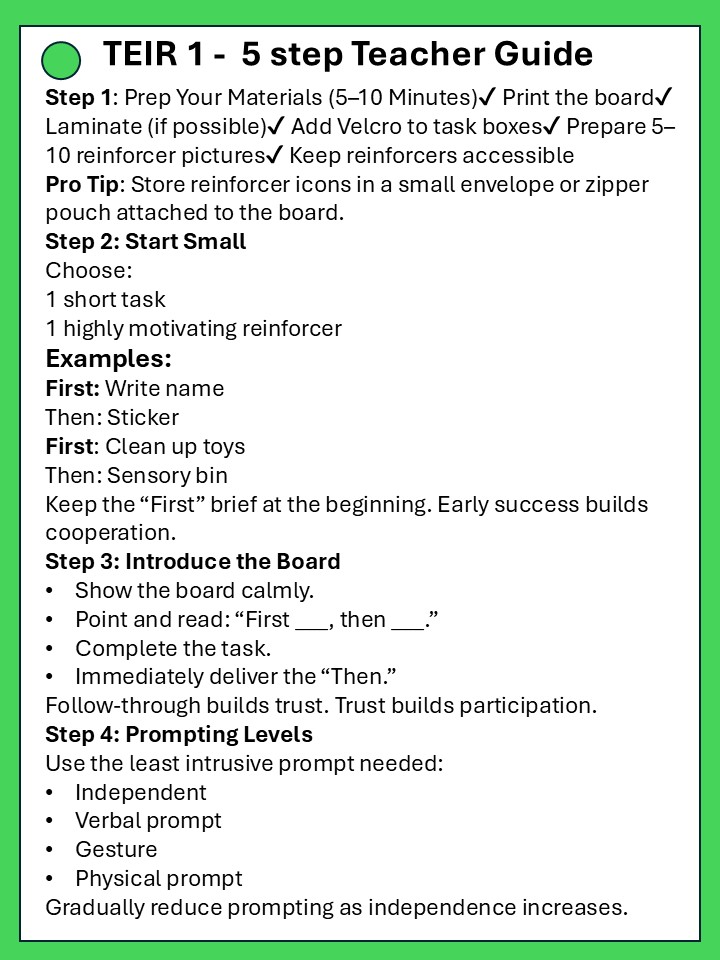
🟢 TIER 1 – This printable First–Then board pack includes:
✅ Full-Size First–Then Cards (Color + Black & White) ✅ Desk-Sized Mini First–Then Strips ✅ Editable Templates (with Power point) ✅ Reinforcer Choice Page & Toolkit
1.Calm down corner visuals
2.Break cards
3. “all done” cards ✅ Quick Teacher Implementation Guide and data sheets
Perfect For:
Autism classrooms
Self-contained special education
Resource rooms
Early childhood special education
Behavior intervention support
Response to Intervention (RTI) Tier 2 behavior support
How to Use in Your Classroom
Use these First–Then boards to:
✔ Reduce task refusal ✔ Improve transitions ✔ Increase work completion ✔ Support positive behavior plans ✔ Build independence in young learners
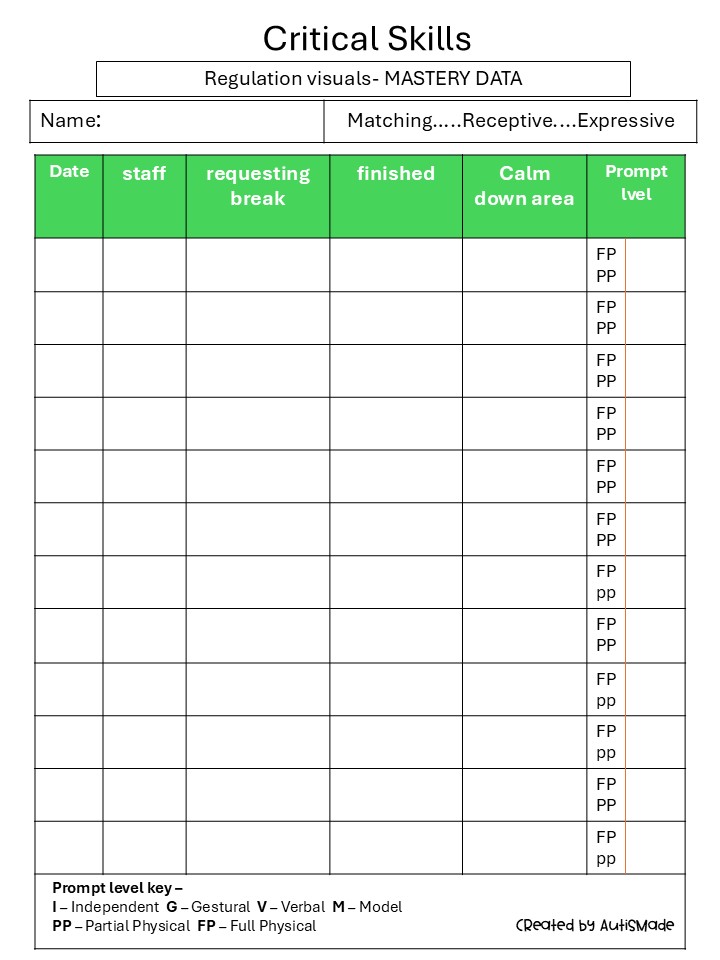
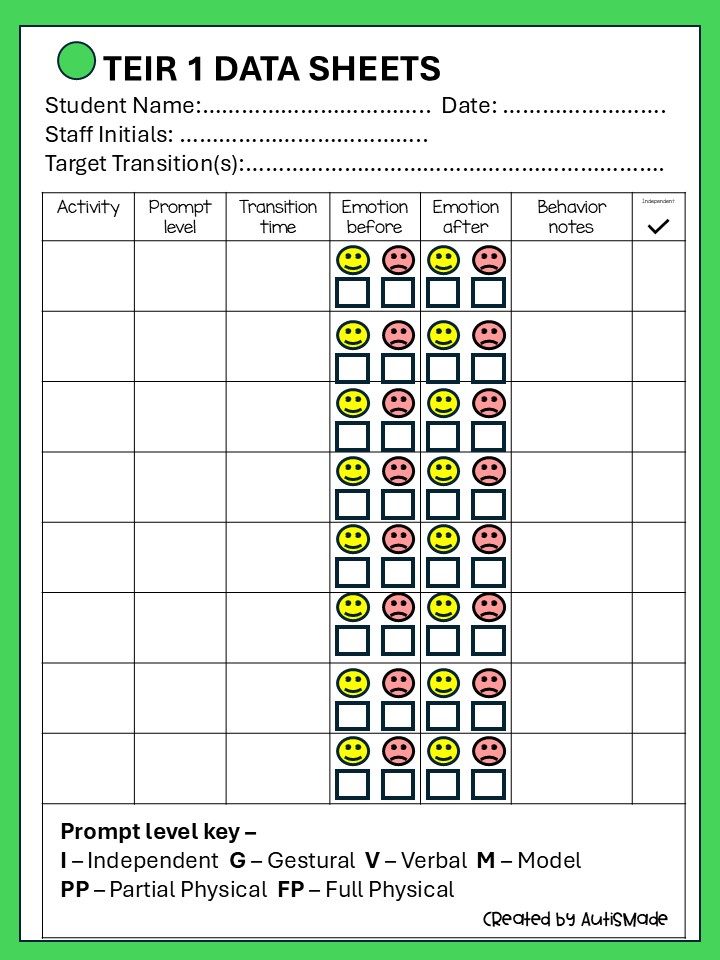
Data Sheets :
Track progress with the quick Teacher Implementation Guide and Data Sheets!
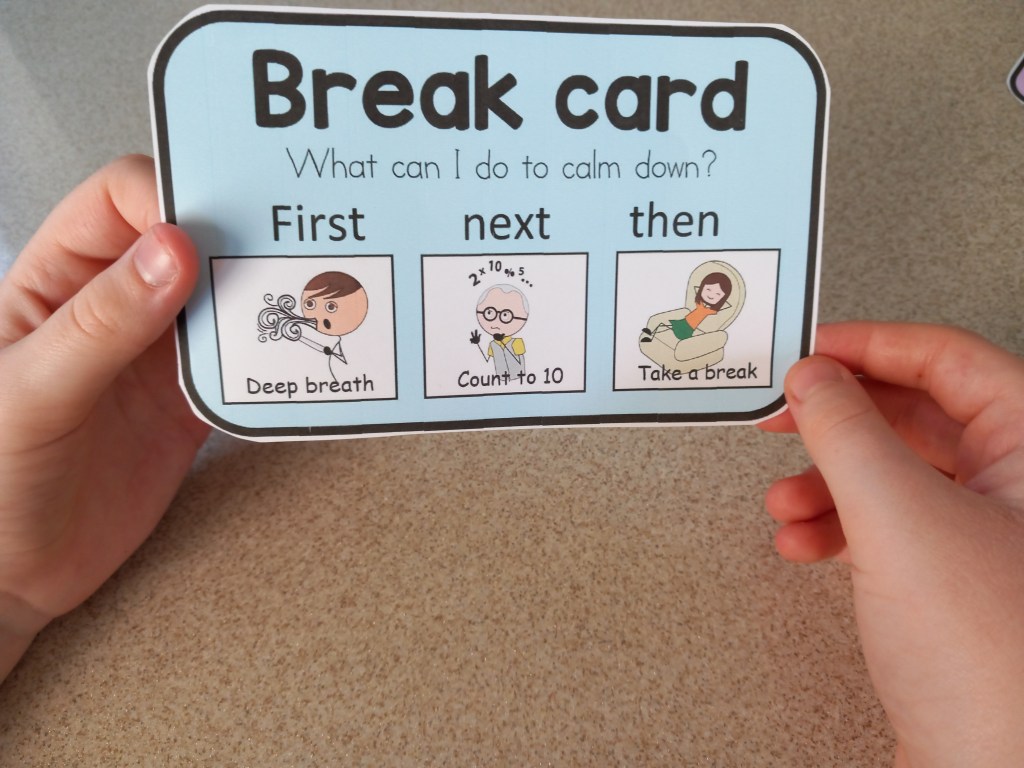
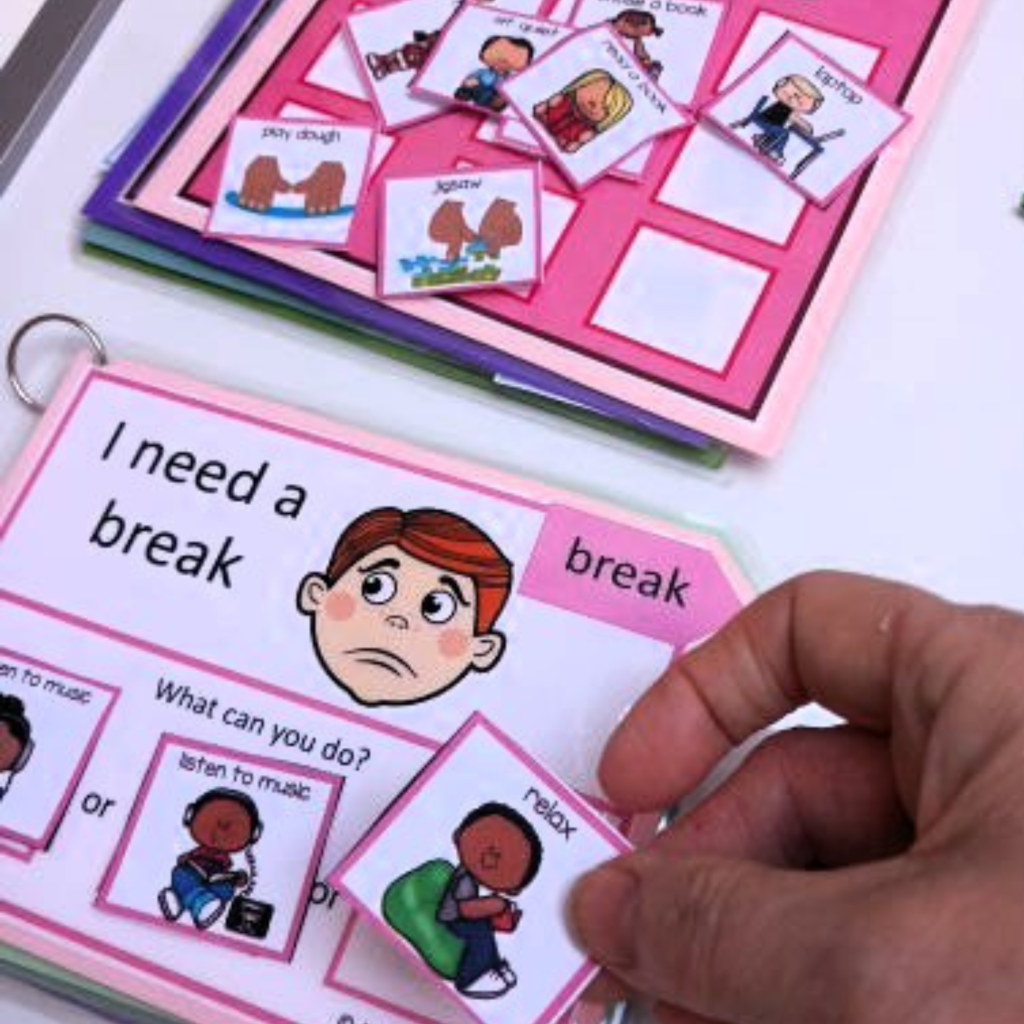
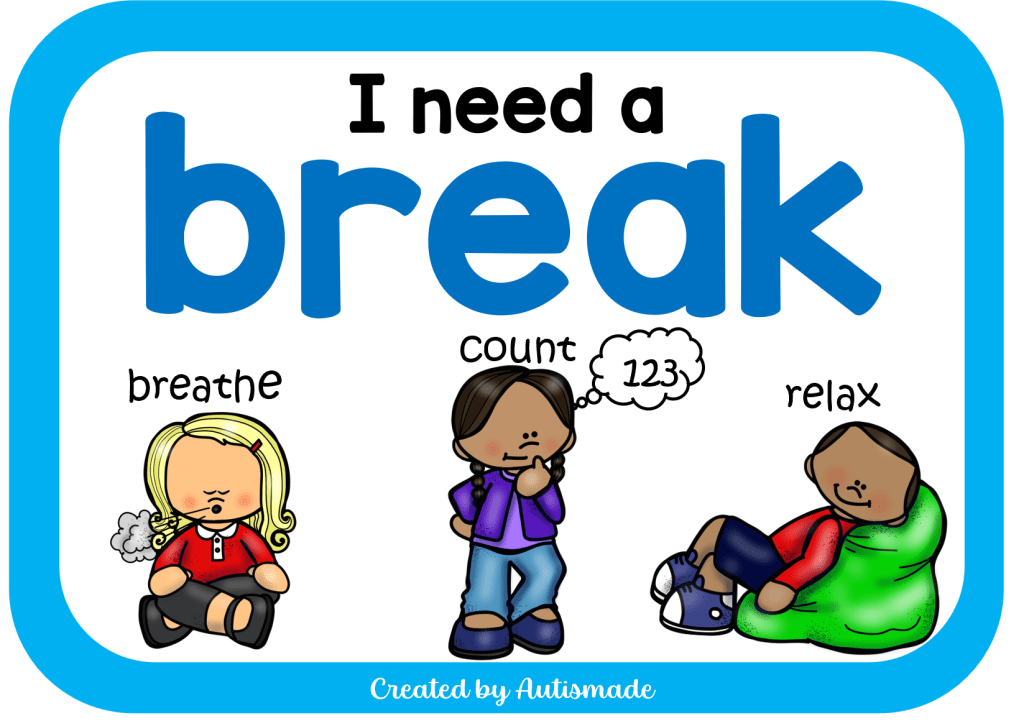
For many nonverbal students, challenging moments don’t come out of nowhere. They build quietly. Sensory overload, frustration, or just needing a pause. The challenge is not the feeling itself, it is not having a clear way to say, “I need a break.”
The good news? This is a skill you can teach, and once it clicks, it can completely shift the tone of your classroom.
Start with a Simple Way to Communicate
Think of this as giving your student a “pause button.”
Choose one clear, consistent method:
A break card with a simple symbol
A button on an AAC device
A sign or gesture
Keep it easy, accessible, and always within reach. If it takes effort to find, it will not get used when it matters most.
Model It Like It Matters (Because It Does)
Students will not magically know what the break card means. You need to show them.
Use it yourself. Yes, really.
Pick a calm moment and say, “I need a break,” while using the card or device. Keep the language short and consistent. You are building a connection between the action and the meaning.
Over time, start to fade that support. The goal is independence, not perfection.
Honour the Break (This Part Is Everything)
When a student asks for a break, respond like it matters. Because it does.
Give the break right away
Keep it short and predictable (around 3–5 minutes)
Use a consistent break space or activity
This teaches one powerful lesson: communication works.
Teach the “When,” Not Just the “How”
Once the skill is there, you can shape it.
Help students understand timing:
Use visuals like “first work, then break”
Start small (one task, then break)
Slowly build up tolerance
This keeps the strategy practical for real classroom routines.
Use Visual Supports to Make It Click
Visuals reduce guesswork and lower stress.
Helpful tools include:
Break cards
Visual timers
Simple schedules
These act like a roadmap, showing students what is happening now and what comes next.
A Few Pitfalls to Skip
Even great strategies can wobble if these sneak in:
Waiting until the student is already overwhelmed
Saying “not now” when they request a break
Turning breaks into a reward or punishment
Removing the communication tool
Consistency is what makes the skill stick
The Bigger Picture
Teaching a student to ask for a break is not just about avoiding meltdowns. It is about giving them a voice, a sense of control, and a safer way to navigate their day.
And once that “pause button” is in place, everything else becomes a little more manageable. For them, and for you.
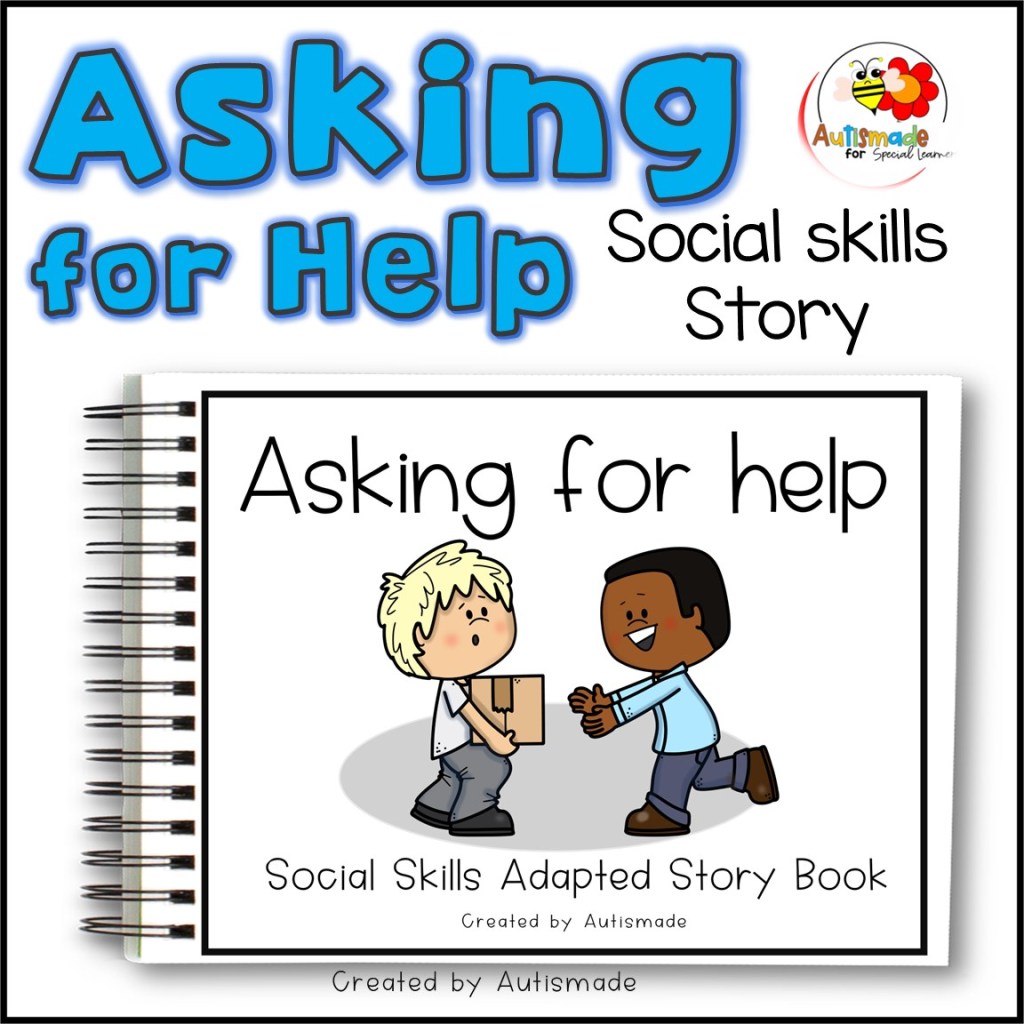
Support students with additional needs in developing essential communication skills with this “Asking for Help” social skills narrative. Created with clear language, visual supports, and structured activities, this resource helps learners understand how and when to ask for help in a calm, appropriate, and effective way. Ideal for SEN settings, it promotes emotional regulation, independence, and functional communication skills in a supportive learning environment.
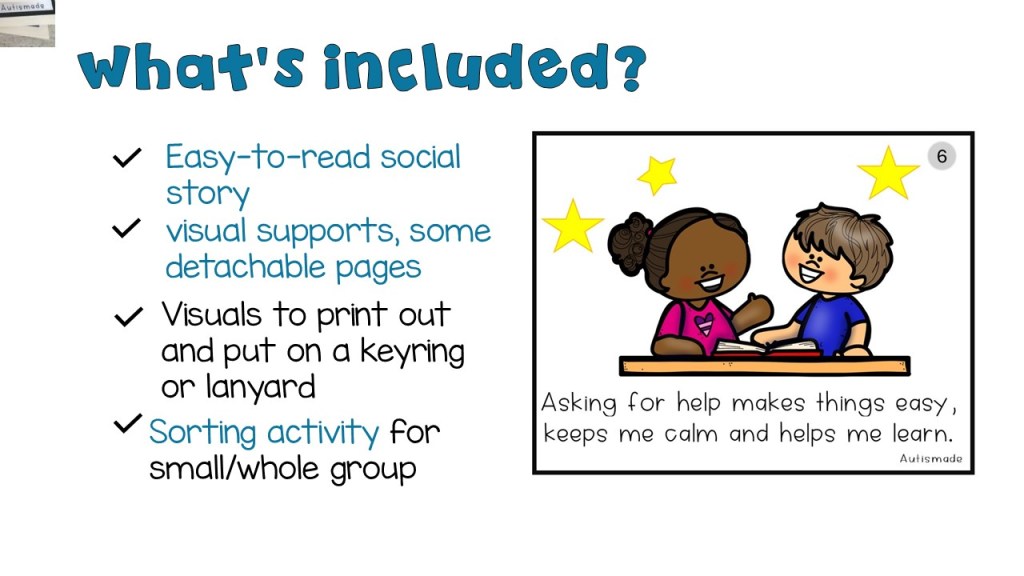
* Easy-to-read social story (kid-friendly text)
* Visual supports on every page, some detachable
* Printable with some interactive pages
* Great for whole-group lessons, small groups, or one-on-one use
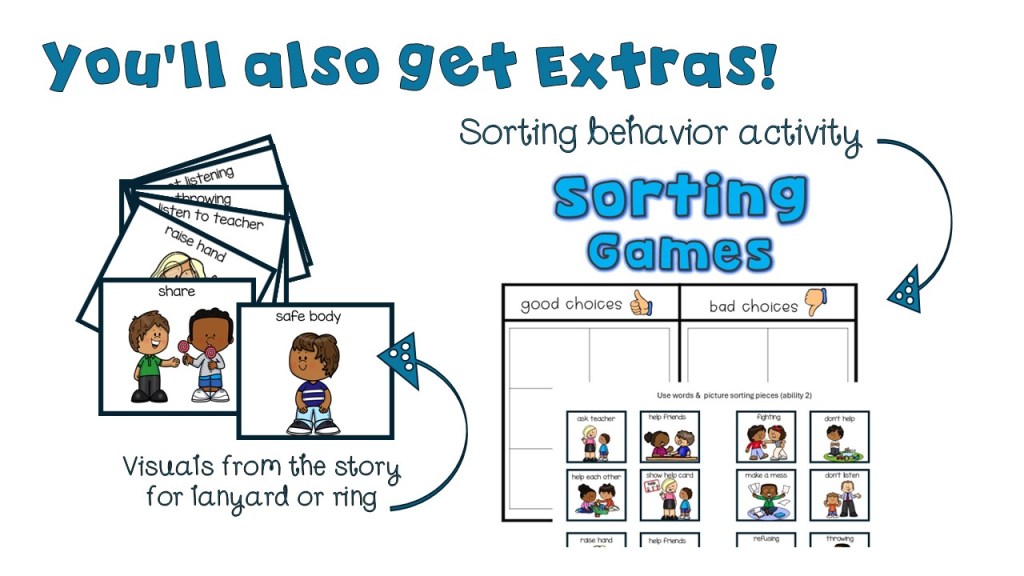
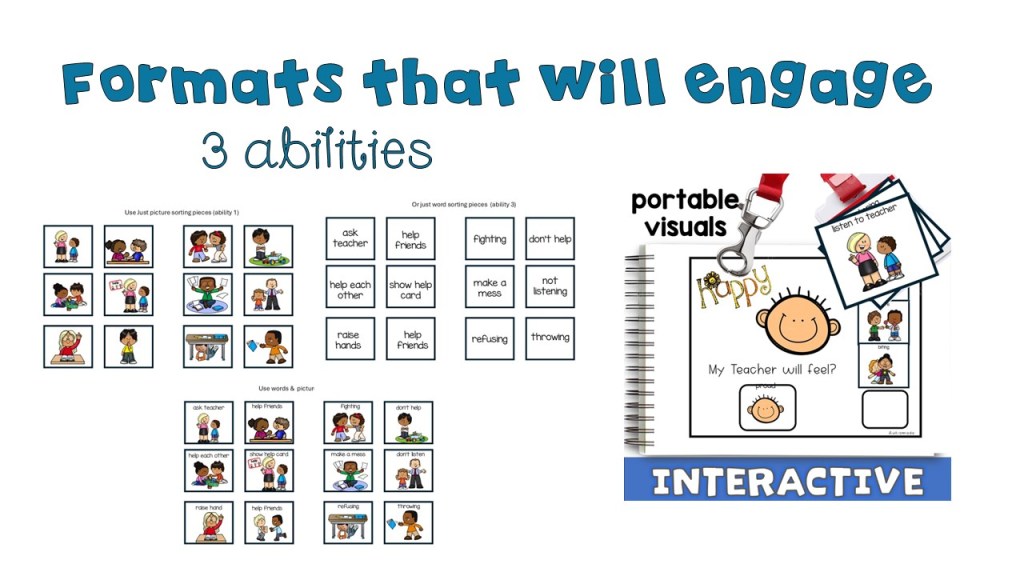
* Behavior sorting game with visual cards!
These added resources helps teachers, therapists, and parents gently guide children through real-life situations where they can make good and bad choices. Great for supporting classroom expectations or helping individual students who need extra practice.
Perfect for:
Preschool and Pre-K Early Childhood Special Education (ECSE) Social-emotional learning (SEL) Behavior support and classroom Expectations
Why you’ll Love It: Clear visuals support comprehension Repetitive and predictable text builds confidence
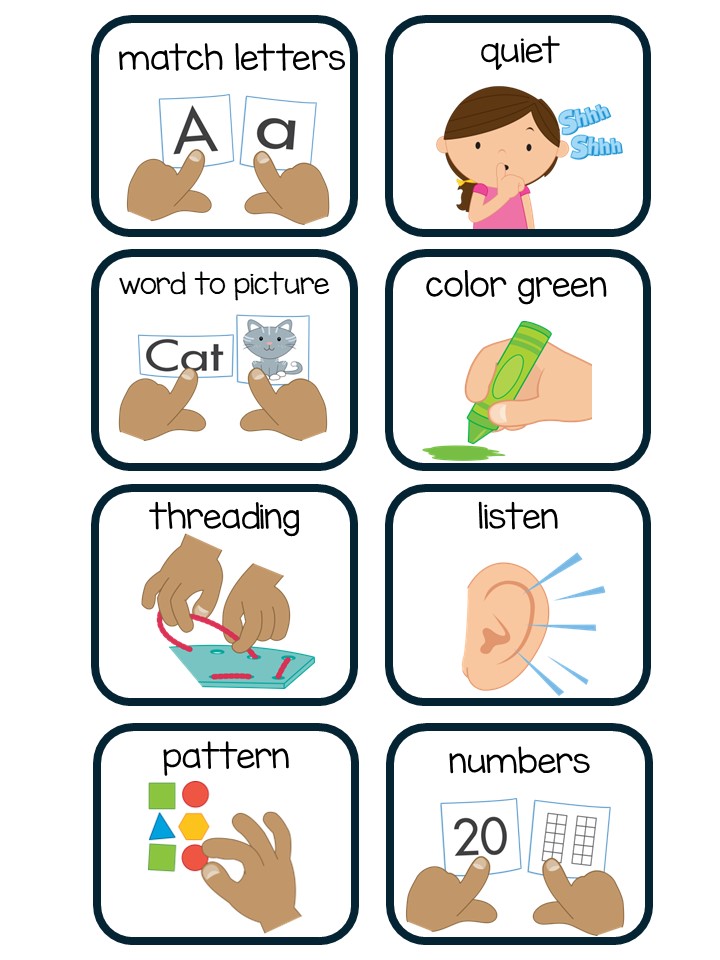
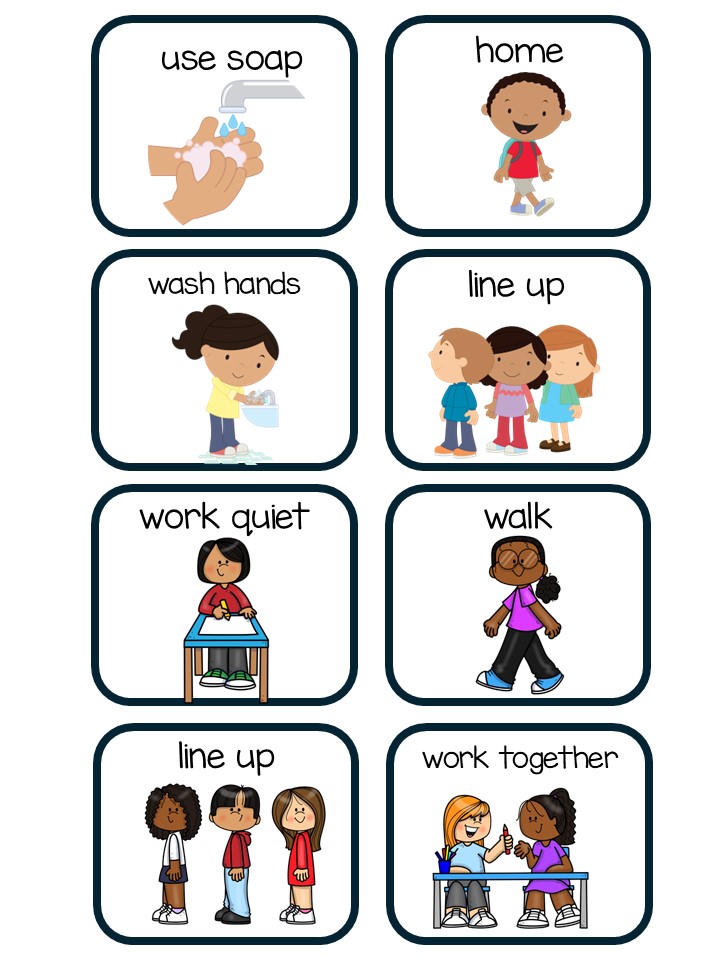
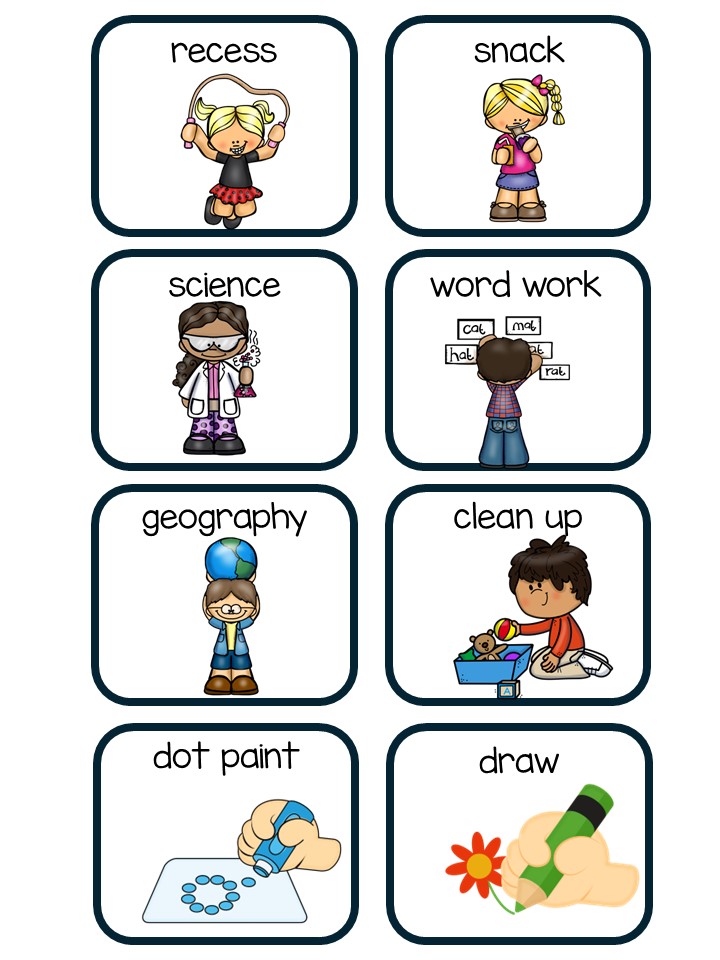
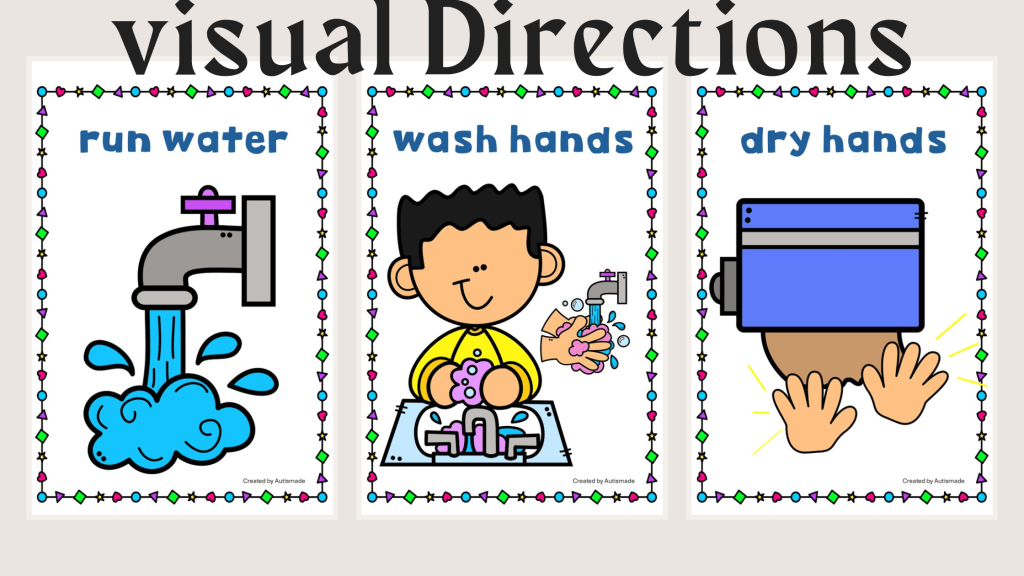
Classroom management in a special education setting often requires creative, student-centered strategies that support diverse learning needs. One highly effective and versatile tool that special educators use is visual direction cards.
Visual direction cards are more than just classroom aides — they are tools that foster independence, reduce behavioral challenges, and create a more structured and inclusive learning environment.
What Are Visual Direction cue Cards?
Visual direction cards are simple, illustrated cues that provide clear, step-by-step instructions or expectations. They often use a combination of text and images or symbols to help students understand what is being asked of them, even if they struggle with verbal instructions or have limited language skills.
Examples include:
“Sit down”
“Raise your hand”
“Get your materials”
“Take a break”
“All done”
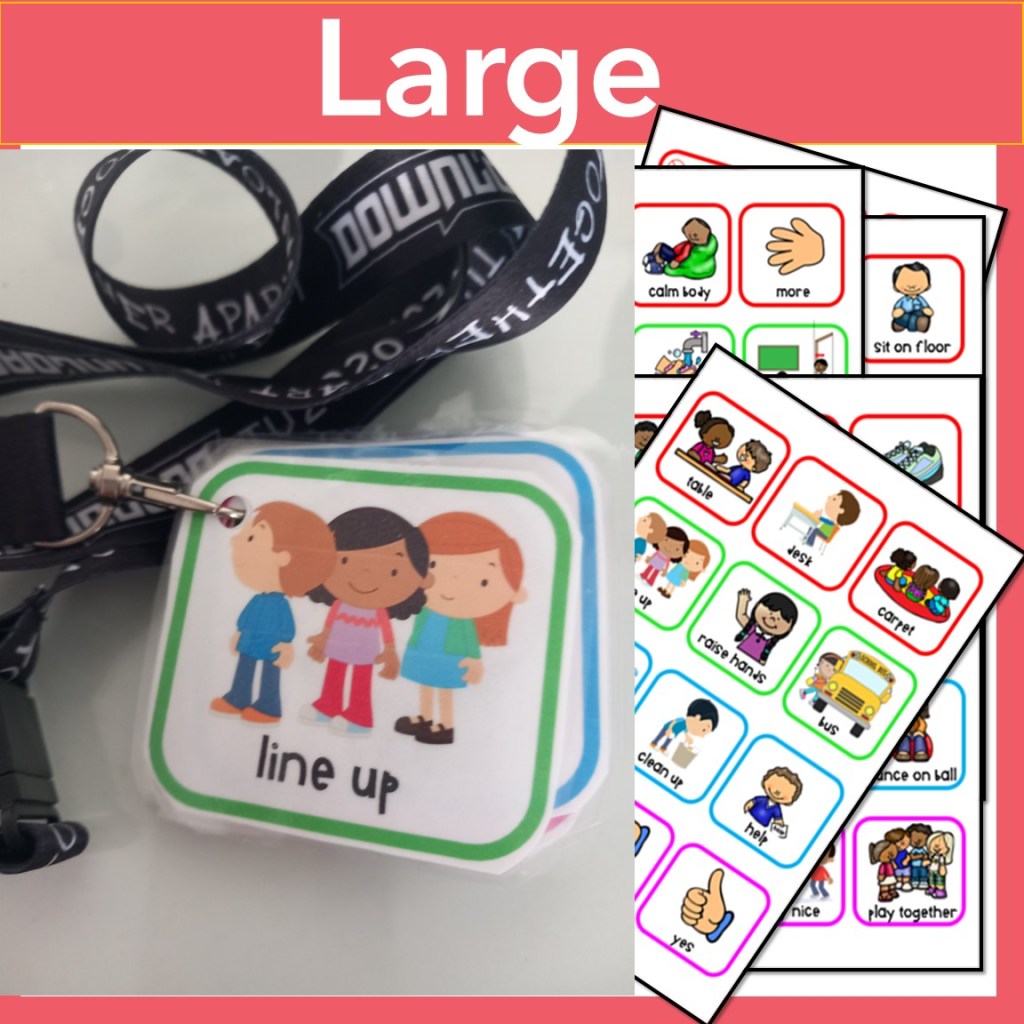
They can be printed on cardstock, laminated, attached to lanyards, placed on desks, or mounted on Velcro boards for easy access and use
Why Use Visual Direction Cards?
1. Promote Independence Visuals allow students to process information at their own pace. Instead of relying on adult prompting, they can refer to cards to understand what to do next. This boosts confidence and helps them develop problem-solving skills.
2. Reduce Verbal Overload Many students in special ed settings experience sensory processing or language delays. Visual directions minimize stress by providing clear, concise instructions without relying on verbal cues.
3. Support Positive Behavior When expectations are clear, students are more likely to engage in appropriate behavior. Visual cards can be used proactively to guide transitions, routines, and self-regulation.
4. Increase Classroom Efficiency With visual directions in place, teachers can spend less time repeating instructions and more time facilitating learning.
Strategies for Using Visual Direction Cards Effectively
1. Teach the Cards Introduce cards one at a time during calm, structured parts of the day. Model the behavior and have students practice using them until they become familiar.
2. Make It Student-Centered Personalize cards for individual needs. Some students may need large icons, others may benefit from first-person phrasing (“I need a break”), or even real photos instead of clipart.
3. Create a Visual Schedule Use direction cards to build a daily schedule that students can follow independently. This supports executive functioning and helps reduce anxiety during transitions.
4. Pair with Reinforcement Systems When students successfully follow visual directions, reinforce their efforts with praise, token boards, or other motivators. This strengthens the connection between visual cues and positive behavior.
5. Encourage Generalization Use direction cards in different settings — during centers, specials, lunch, or community outings or for personal hygiene — so students learn to apply the skills beyond the classroom.
Visual direction cards may seem simple, but their impact is profound. They empower students with the tools they need to be more independent, confident, and successful in and out of the classroom.
As a special education teacher, your ability to adapt tools like visual cards can transform daily routines and build lifelong skills for your students.