I still remember the year I realized how much visual classroom supports matter. My centers were set up beautifully, my materials were ready, and my groups were organized—but every transition was a struggle. My students weren’t misbehaving—they just couldn’t remember where each center was or what it was called.

Once I added simple classroom center signs with pictures, everything changed.
Suddenly, students walked into centers with confidence. They followed the visuals, matched their cards to the center labels, and moved with so much more independence. I wasn’t repeating directions over and over. I wasn’t redirecting nearly as much. And best of all, the classroom felt calmer—for them and for me.

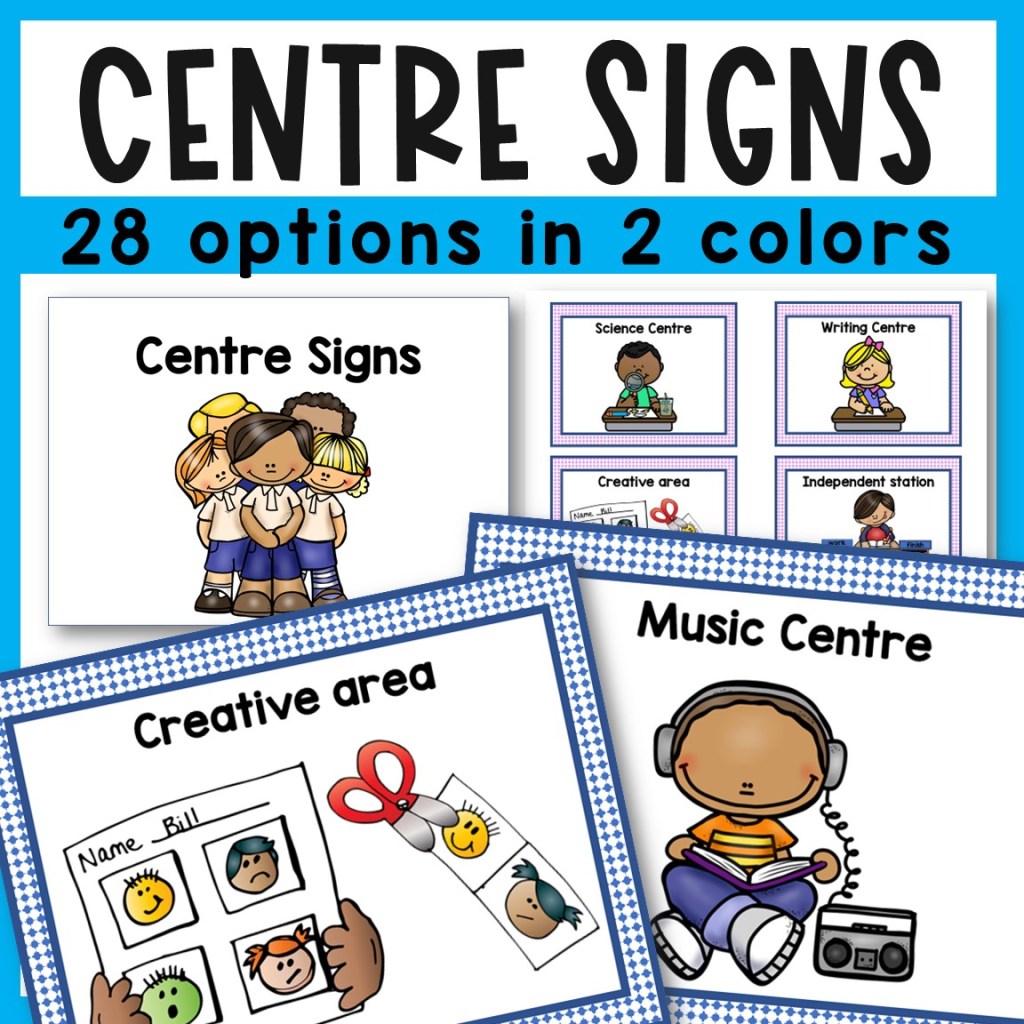
That’s why I love using visual center signs in my early childhood classrooms, especially in PreK, kindergarten to 2nd grade. These visual supports take away the confusion so students can focus on the learning—whether they’re moving to the literacy center, the math station, the writing center, or your independent area.
This set includes 28 different classroom center signs in two color options, which makes it easy to match any classroom theme. They help young learners navigate the room, build independence, and develop smoother routines—all without extra effort from you.

Sometimes it’s the smallest classroom management tools that make the biggest difference. Center signs truly did that for my centers, and I hope they bring the same calm and clarity to your space too.
Get the full set of center signs and start transforming your center routines today.