Tips for setting up Visual Schedules in Special ED

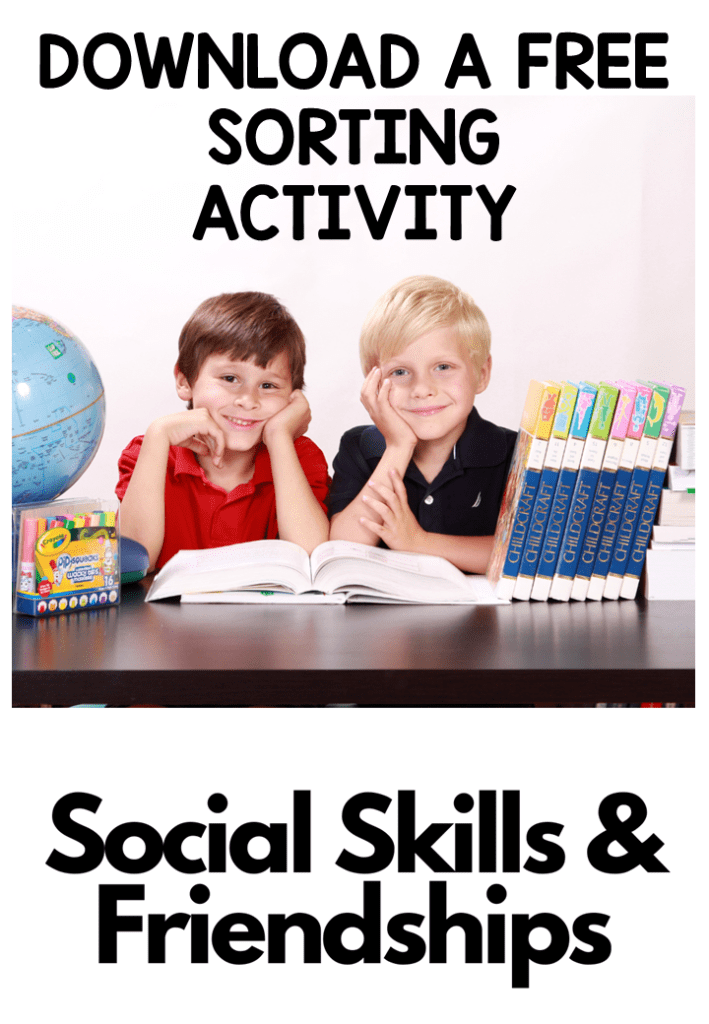
Having a selection of Communication Strategies ready to use is always a good idea in Special Ed! Having a visual schedule is one strategy I find very effective in class. Below I’ve listed my schedule tips and other strategies that have really helped my young leaners settle into a structured learning environment.

Visual Schedules – Set out visuals to reflect the order of the class day. They should be designed to support your student through a smooth transition eg. from activity to activity, room to room or within tasks.  

Here are some quick tips for setting up and getting started!

1. START SIMPLE – Make visuals for just meaningful times of the day eg, morning work, break, lunch etc,  this will help your young students learn to recognise and correspond each picture with each of the activities.

2. BUY A LAMINATOR – Your laminator will become important! If you want all your hard work to last, laminate all mounts and visuals because they are going to go through a tough time!

3. WALL MOUNT  – Mount on a wall, the schedule must be low enough for your student to access and take away finished symbols in the daily routine. 

4. USE A FINISHED BOX – Attach a finished box at the end or side of the schedule to drop the finished visuals in before starting a new activity. 

5. TRY A FILE FOLDER – A portable schedule can be used in a file folder in the same way as a wall mounted one. I find these easier with older children to check into the activities and more efficient in busy classrooms. Pop their name on it and keep all their individual support visuals in one place. 

6. MODLE AND PRACTICE – Always model, practice and remind your busy student at the beginning of each activity to, “check in”.  Make a plan to pull back on all prompting until they begin to use this system independently!

Timers – For giving a break and reminding students how long they need to work and how long left on free time!

Routines – Keep Break, Lunch and free choice the same time each day!

Consistency – All staff should use the same strategies and follow this classroom management structure!

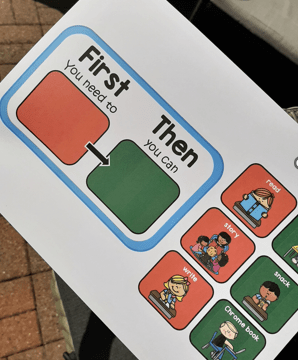
Positive Reinforcers – Use token reward boards, First and Then, Behavior regulation tools and Reward systems tailored to individual interests and likes!

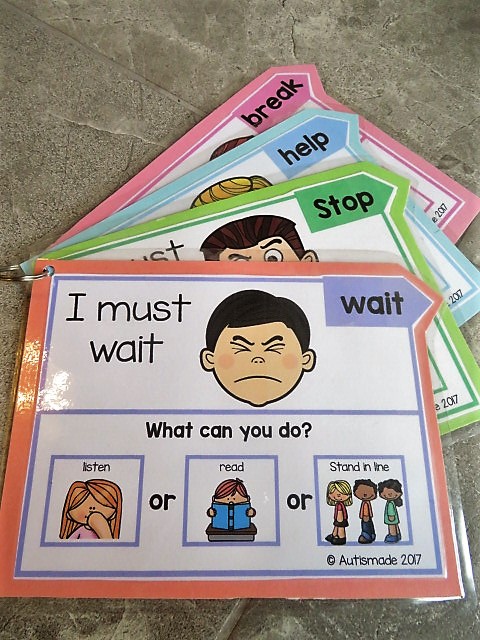
Communication – Critical skills for Functional Communication, a means in which your non verbal student is able to request a “break” “help”  or asked to “wait”

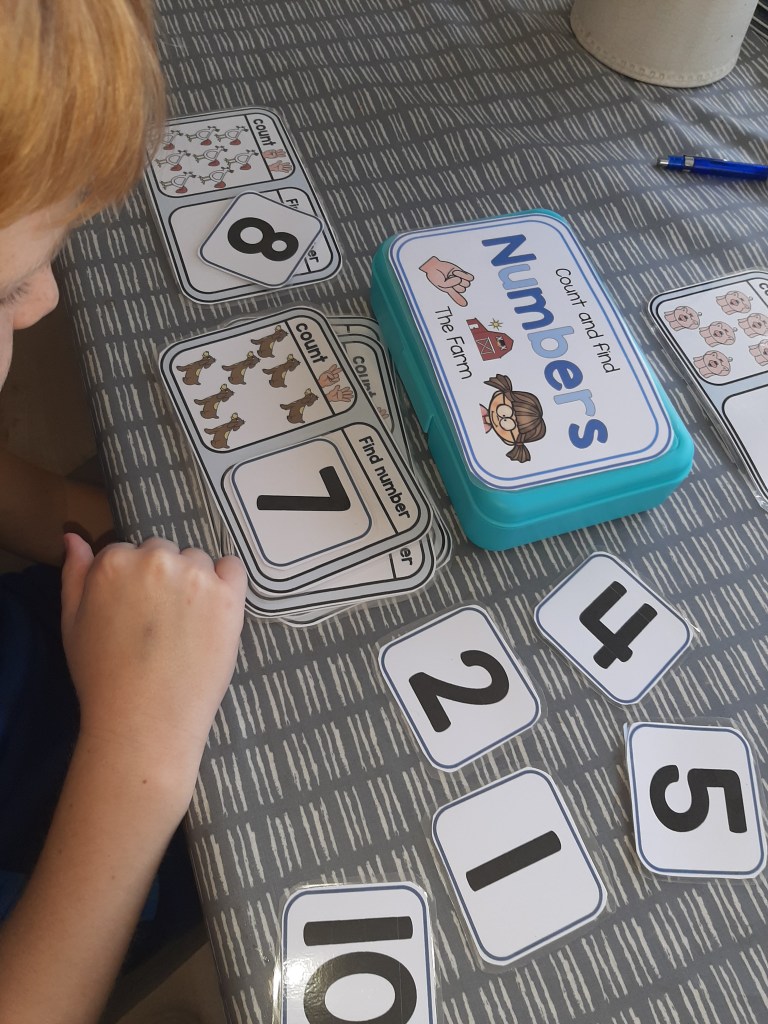
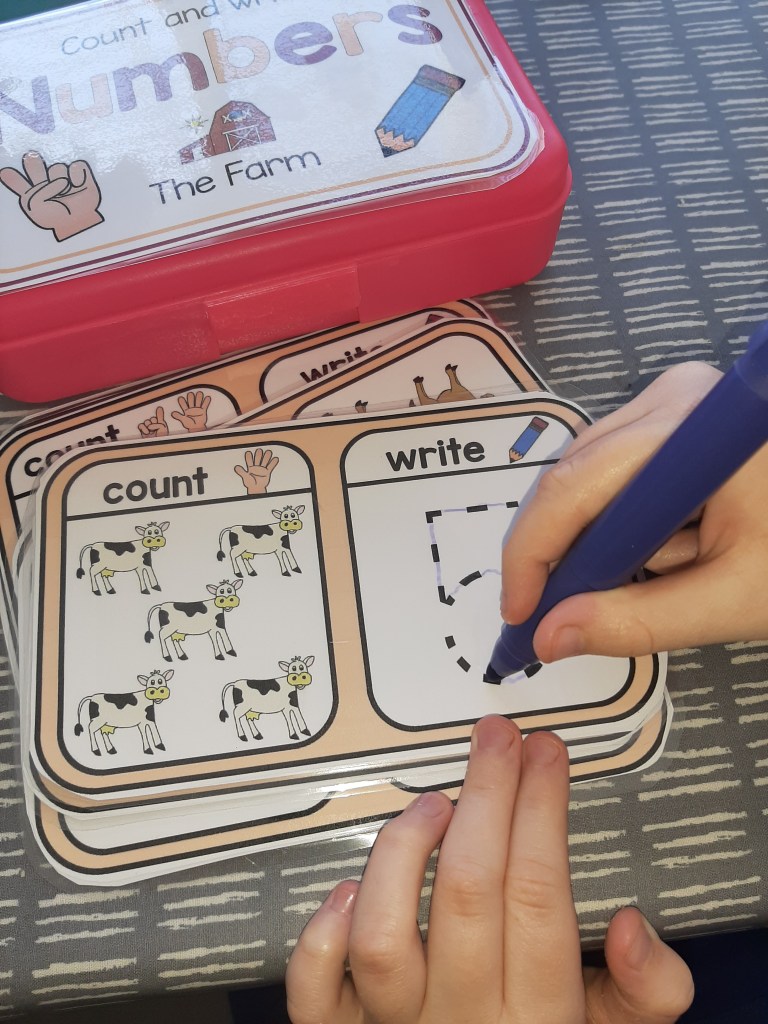
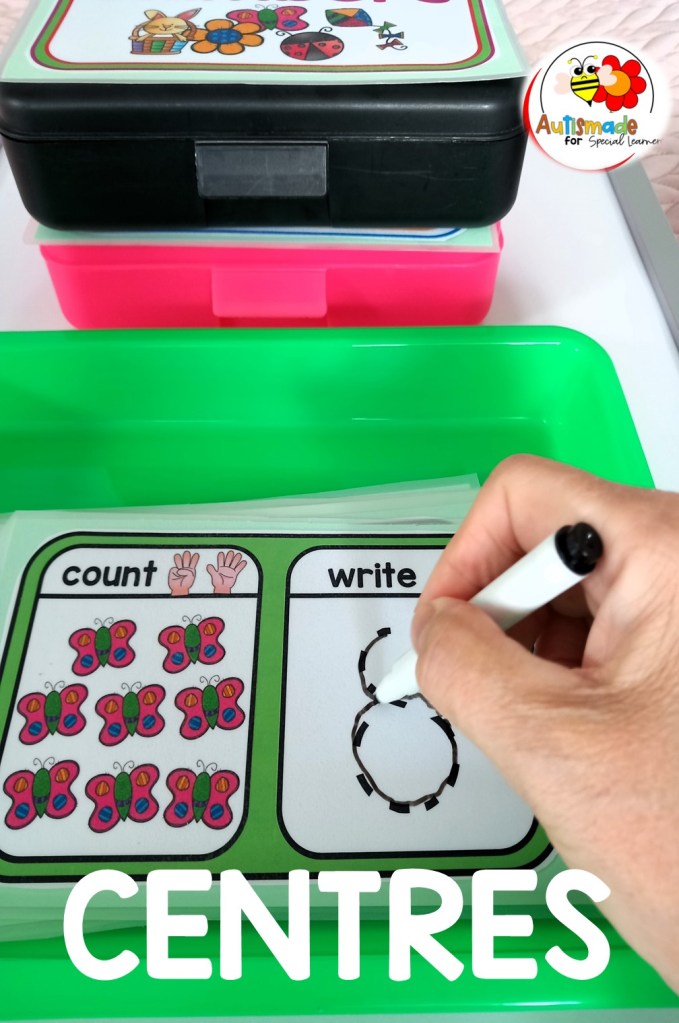
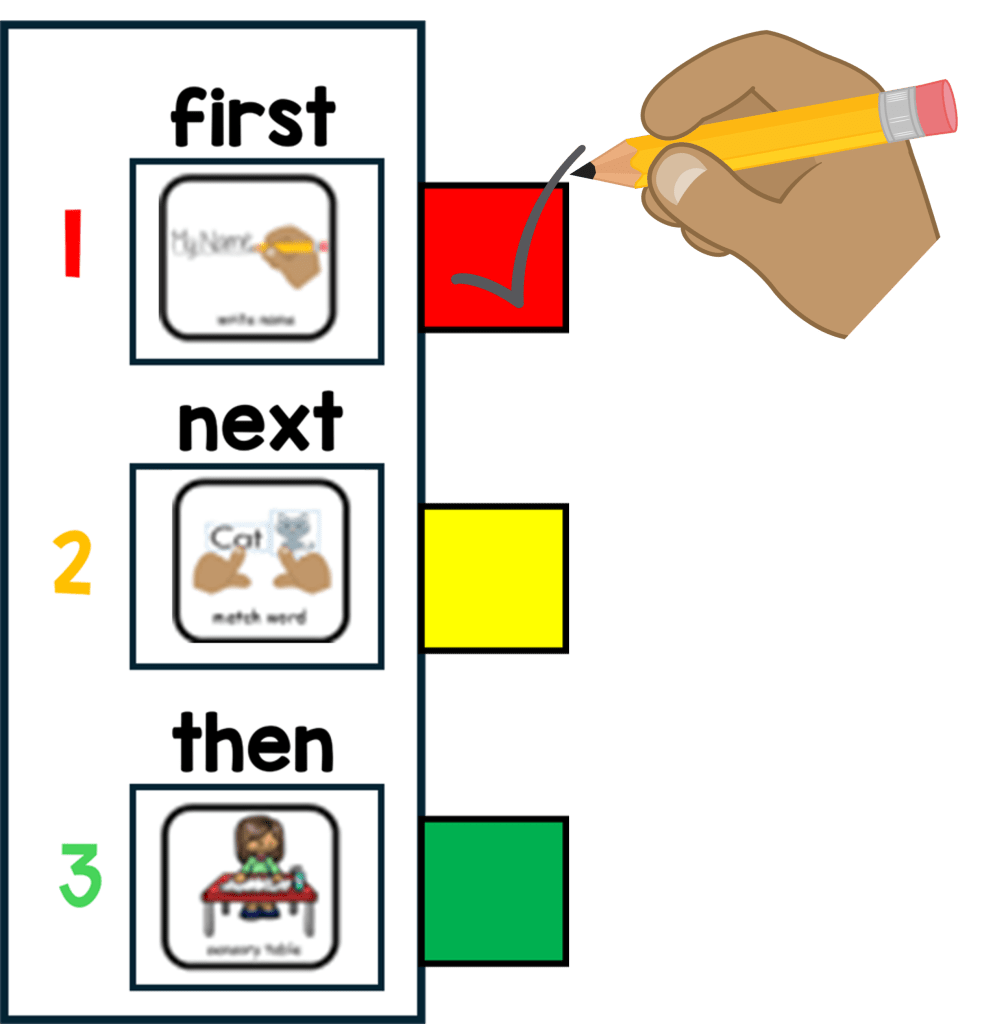
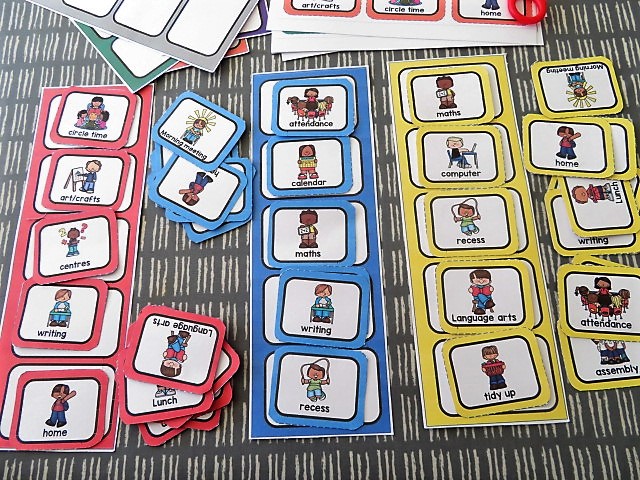
Colour Coordinate – For some of my young learners I’ve introduced portable schedules, that I’ve colour coordinated! 
I’m pleased it offers all the strategies I wanted to incorporated throughout the day.
I keep them in a handy place for my students to access first thing in the morning and follow the schedule by checking into the work areas they need to complete.
There’s a set place in the booklet for the schedule symbols, a token reward system, plus a place for reinforcer visuals and Critical Communication cards so students can ask for a Break or Help, all while reminding and keeping a consistent approach that staff can help students to follow!

Visit my TPT Store here

Social Skills-Being Kind to Friends

Download a FREE sorting activity

We often spend time teaching our children about friendships in school, often saying, share with your friends, kind hands, play nice. But some children lack the social skills, for what ever reason, to maintain healthy interactions with other kids and need regular reminding.

Its sometimes important to teach basic social skills to young learners on how to be a good friend. They might need us to help them understand some of the more complex parts of what being a good friend is and what that looks like.

Learning about how their own behaviours will affect others, about recognising other people’s feelings and how to respond in an understanding and caring way in order to maintain friendships is important to.

When difficulties arise some children can use visual guides or social narratives to guide them through the what’s and what-nots to do in friendship groups.

TIP – Use Social supports to reinforce positive behavior regularly either in a one to one situations or as part of a group. Using simple visuals with easy instructions during social skill sorting games and activities can help young learners stay on track.

Being kind Social Story –

Social Stories on TPT

Download free activity here

Effective Task Boxes for Autism

Try a Freebie

When helping a child in Special Education to learn a new skill you need to give clear and simple instructions. A visually structured task can provide the small steps needed for them to understand, stay on track and complete an activity.

These type of Task box activities are broken down with one question to answer on each card as not to overload the learner. They enable the child to focus not only on the basic academic skills in front of them but strengthen fine motor skills, help the student develop self esteem and promote the independence I love to see in my classroom.

My workstations provide a calm area that has clear and specific visuals to help my students focus and learn. Adding these type of self-contained tasks at stations have provided continuous structure for my students to learn and master basic skills with no need for them to wander off and find other materials!

They are so handy to grab for my small group sessions as well as in the independent centres. I’ve organized them into their Curriculum groups and were able to fit into sandwich size containers! Now they’re labelled, easily stored and always ready and on hand.

It took some time to prepare them all in the beginning but now they’re just always ready to grab and go!

PICK UP FREEBIE Task Cards Here

“Click Below” For more Task box ideas Visit my TPT Store!

Basic Math Task boxes

Color Task Box Activity

Task Cards – Find the Same

Color, Shape, Number, pegging

Opposites Task Cards

Letter Tracing Task Cards

Fall Task Cards – I can write numbers to 10

How to use First and Then Visuals

Children with SPED can sometimes find a classroom a bit confusing and can quickly become distressed with all the changes that are taking place around the room. My job is to help keep them calm and cope with what is happening. Sometimes I use visual supports to prepare and explain what is happening next.

I have found the “First and Then” Strategy a visual way of understanding what is expected throughout the day and a simple start to scheduling. As part of my structured teaching environment I use this simple timetable with individual work and in class activities.

Before starting a task and after a motivator assessment my young learners are offered a selection of visual reinforcers to choose from, this icon is placed in the “Then” side of the board.

And I place the icon of the task to be completed on the “First” side of the board. While teaching this strategy for the first few times I use quick errorless tasks and partially prompt my student if they become distressed.

Once established, my student will learn to follow the first activity independently and transfer to the next activity shown.

For More information click here

Teaching Functional Communication in Behavior Management

Functional Communication is an important skill to master in any successful Behavior Management Plan. Here’s a brief description on how I teach theses skills with my young learners.

How I Teach students to use a “Break or Help” card

1. Firstly you need to help your student realise when they need to use the break/help card, preferably before they get too frustrated or loose concentration. At the start of any activity, show the student the break card and place the card where they can easily reach it.

2. Point to the break/help card and tell them, “This is your break/help card. You can use it to ask for a break.” When your student starts to get frustrated or loose interest, You say “If you are getting upset, use your break card to tell me you need a break/help.”

3. Once he requests the card allow the student to take a break/help from his tasks, or direct the student to move away to the “break area.” I found that self regulating visuals on the bottom of the card is a fantastic way of calming your student while on a break.

4. Requesting is an important part of teaching the student to trust and use the visual support, once they are consistently asking for breaks, you may begin to extend the time between the request and the actual break.

5. Visuals to the bottom of the support cards help redirect the student to what he can do instead, or while using the card. I hang them up on a keyring for easy access in my calm down corner!

Visit my TPT Store for more details